Below are the steps to upgrade VMware App Volumes 2111 (4.5) to App Volumes 2209 (4.8). The steps should be the same for upgrading any previous 4.X version of App Volumes, but be sure to reference the official docs in case there are exceptions. If you’re like me and can’t keep the build numbers and versions straight here is the decoding key for how VMware versions App Volumes. Before changing any versions of software be sure to plug in all the various components of your environment to the Product Interoperability Matrix. You’d hate to upgrade and find the versions are not compatible. Let’s try to avoid using those backups 😉
I recommend running through the process in a lab or test environment first. These steps assume a lab and leave out a few production steps that may be necessary. Such as scheduling a maintenance window and performing a database backup. More details can be found here.
App Volumes 2209 Upgrade Prep
I’ll be performing a rolling upgrade since I have two App Volumes Managers paired together for resilience. A quick check from the admin portal under Configuration > Managers will show each manager’s installed version. A rolling upgrade allows me to perform the upgrade on one manager at a time. Through the use of a load balancer this can ensure the service stays up during the upgrade. Reference the documentation for Considerations for Performing Rolling Upgrades.

Start by downloading the ISO from Customer Connect. I downloaded App Volumes 2209. The download should be a .iso file and should have a name similar to the below screenshot. If you’re upgrading and the managers are already licensed you don’t need to download the license key.

Take a full backup or snapshot of your App Volumes servers. Being a lab I just took snapshots of my managers.
To do that login to your vCenter and locate the App Volumes servers. Then right-click on the server name and select Snapshots > Take a Snapshot.

Next, give the snapshot a name (A), and optionally give it a description (B). When performing a rolling upgrade it’s recommended to snapshot the virtual machine’s memory as well (C). Then select Create.

Here are the full list of prerequisites.
Upgrading the first App Volumes Manager
When there are multiple App Volumes Managers in an instance there should also be a load balancer sitting out front. Now is a good time to go to the load balancer and disable the App Volumes Manager which will be upgraded first. Ensure there are no users trying to hit the manager.
To get started with the installation we need to be logged into the first App Volumes Manager as an administrator. I’ll be using the service account that I originally installed App Volumes with.
Open the App Volumes ISO that you downloaded. Most modern operating systems will automatically mount it for you when in the ISO format.

Navigate to Installation > Setup.msi

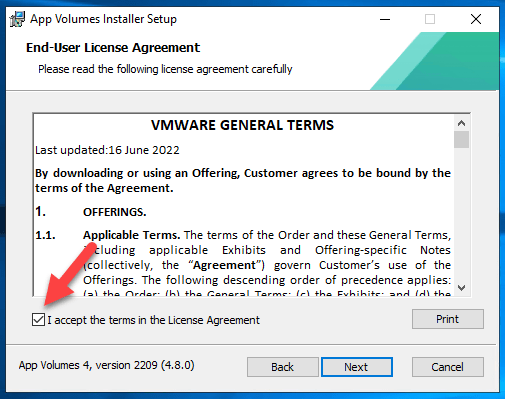
The App Volumes Installer Setup should open. Click Next.

Be sure to accept the License Agreement before clicking Next.
Select Install App Volumes Manager. Then click Install at the bottom. Don’t be thrown off by installation, it will perform an upgrade of the existing App Volumes instance. Depending on your UAC settings on the Windows Server you may get a prompt(not shown in my screenshots) that needs to be accepted before the installation will begin.

The App Volumes installer will perform a system check. In my lab, it took a few minutes to complete.

The installer will display the existing version of App Volumes and remind you to take a full backup if you haven’t already. I previously took vSphere snapshots which will act as a simple rollback should something go wrong. Be sure to follow any backup & recovery procedures your company may have. Click Next to get started.

To kick off the upgrade click Install.

In total, the upgrade took approximately 27 minutes in my lab. The interesting thing that happened about 3 minutes into the installation was a pop-up(shown below) saying a reboot will be required. A reboot prompt such as this is common with VMware installers, but I received two of them a few minutes apart. Both of these appeared to pause the installation and require me to click OK. Unlike most installers, it did not ask for this reboot at the end. Click OK on the prompts and after it is all complete be sure to reboot.

At this point, the upgrade should be complete but does require a reboot. Click Finish and then reboot the guest operating system.

After rebooting pull up a web browser and go to the App Volumes manager’s admin URL(https://appvolumesFQDN). Login to the App Volumes web page with an administrator account. You will be prompted with the Customer Experience Improvement Program (CEIP). You can choose to participate or if not unselect the checkbox and click OK.

To confirm the new version you should see it listed at the bottom of each page or navigate to Configuration > Managers and expand the servers to see each of their versions. Below it shows one of my App Volumes Managers has been upgraded and the second is still on the older version which is what we want to see.

Be aware that if you have multiple App Volumes managers as I do here you won’t have the new features and functionality until all managers within the instance are upgraded to the same version. It’s best we don’t make changes in the environment until all managers are updated to the same version.
Upgrading Additional App Volumes Managers
If you have additional App Volumes managers in the same instance, meaning they all share the same database, we can now begin upgrading them. Follow the same steps we did for the first manager. Be sure to have a backup or current snapshot.
After all App Volumes managers have been upgraded log into one of the admin web pages and navigate to Configuration > Managers. Expand each manager to validate they reflect the same new version. Below you can see that both managers in this instance are at version 2209 (4.8.0.33).

Upgrading App Volumes Agent
With all of the App Volumes managers upgraded to the same version, we can begin updating the App Volumes agent which lives within the guest VMs. For the most part, agent and manager versions have some flexibility in regards to running mixed versions, but in order to take advantage of all the latest features the agent needs to be upgraded to match the managers. Agents older than 2.18 are not compatible with 4.x managers.
Be sure to review the agent upgrade order in case you have additional steps in your environment. If the App Volumes upgrade is a part of a larger Horizon environment upgrade you may need to update other agents first, and possibly uninstall the old agent as opposed to an upgrade. The App Volumes agent is usually the last VDI agent to be installed. Check here for details on agent order. Since I only upgraded App Volumes in my lab I will only be updating the App Volumes agent.
The plan is to update the App Volumes agent in any base images and then rebuild the appropriate Horizon desktop pools. This process may vary slightly depending on your Horizon environment. For example, if you have persistent desktops you may need to install the agent in each VM since rebuilding the pool may not be an option. Here in my lab, I’m updating a base image used for a non-persistent Instant Clone desktop pool.
If you prefer to perform a silent agent upgrade reference these instructions.
Start by logging into the base image as an administrator. Open the App Volumes installer ISO and navigate to Installation > Setup.msi. This is the same setup we ran for the manager upgrade.

On the welcome screen click Next.

For the EULA be sure to click Accept followed by Next.

On the component selection screen select Install App Volumes Agent. Then click Install.

On the welcome screen click Next.

Click Install to get started.

A few seconds later you may get prompted about a required reboot. Click OK to keep the installation going. We will reboot at the end.

Similar to the manager installation I received the reboot prompt twice. Click Ok for both and wait for the installation to complete before rebooting.
The whole process should be quick. In my lab, it was about a minute to complete. Once you see the Completed screen click Finish.

You should receive another restart notification. This time when you click Yes the machine will reboot itself.

After the reboot, if you want to validate that the version is correct check Apps & Features within the guest OS. Below we see 4.8 is now installed.

Finally, If using Instant Clone pools take a new snapshot of the base image and rebuild the desktop pool using that new snapshot.

If all went well you should see your App Volumes packages when you login to one of the virtual desktops. You should also update the App Volumes agent installed in any application packaging VMs you may have.
If you took snapshots at the start be sure to go back and delete them once you are confident the upgrade was a success.
Hopefully you were successful and you now have an upgraded App Volumes environment.
Thanks for reading and hopefully it was helpful!